
Machine Embroidery Applique: How the Stitch Order Works
How machine embroidery applique works: the placement, tack-down and satin cover stitch order, precut vs in-hoop trimming, fabric choices, and common fixes.
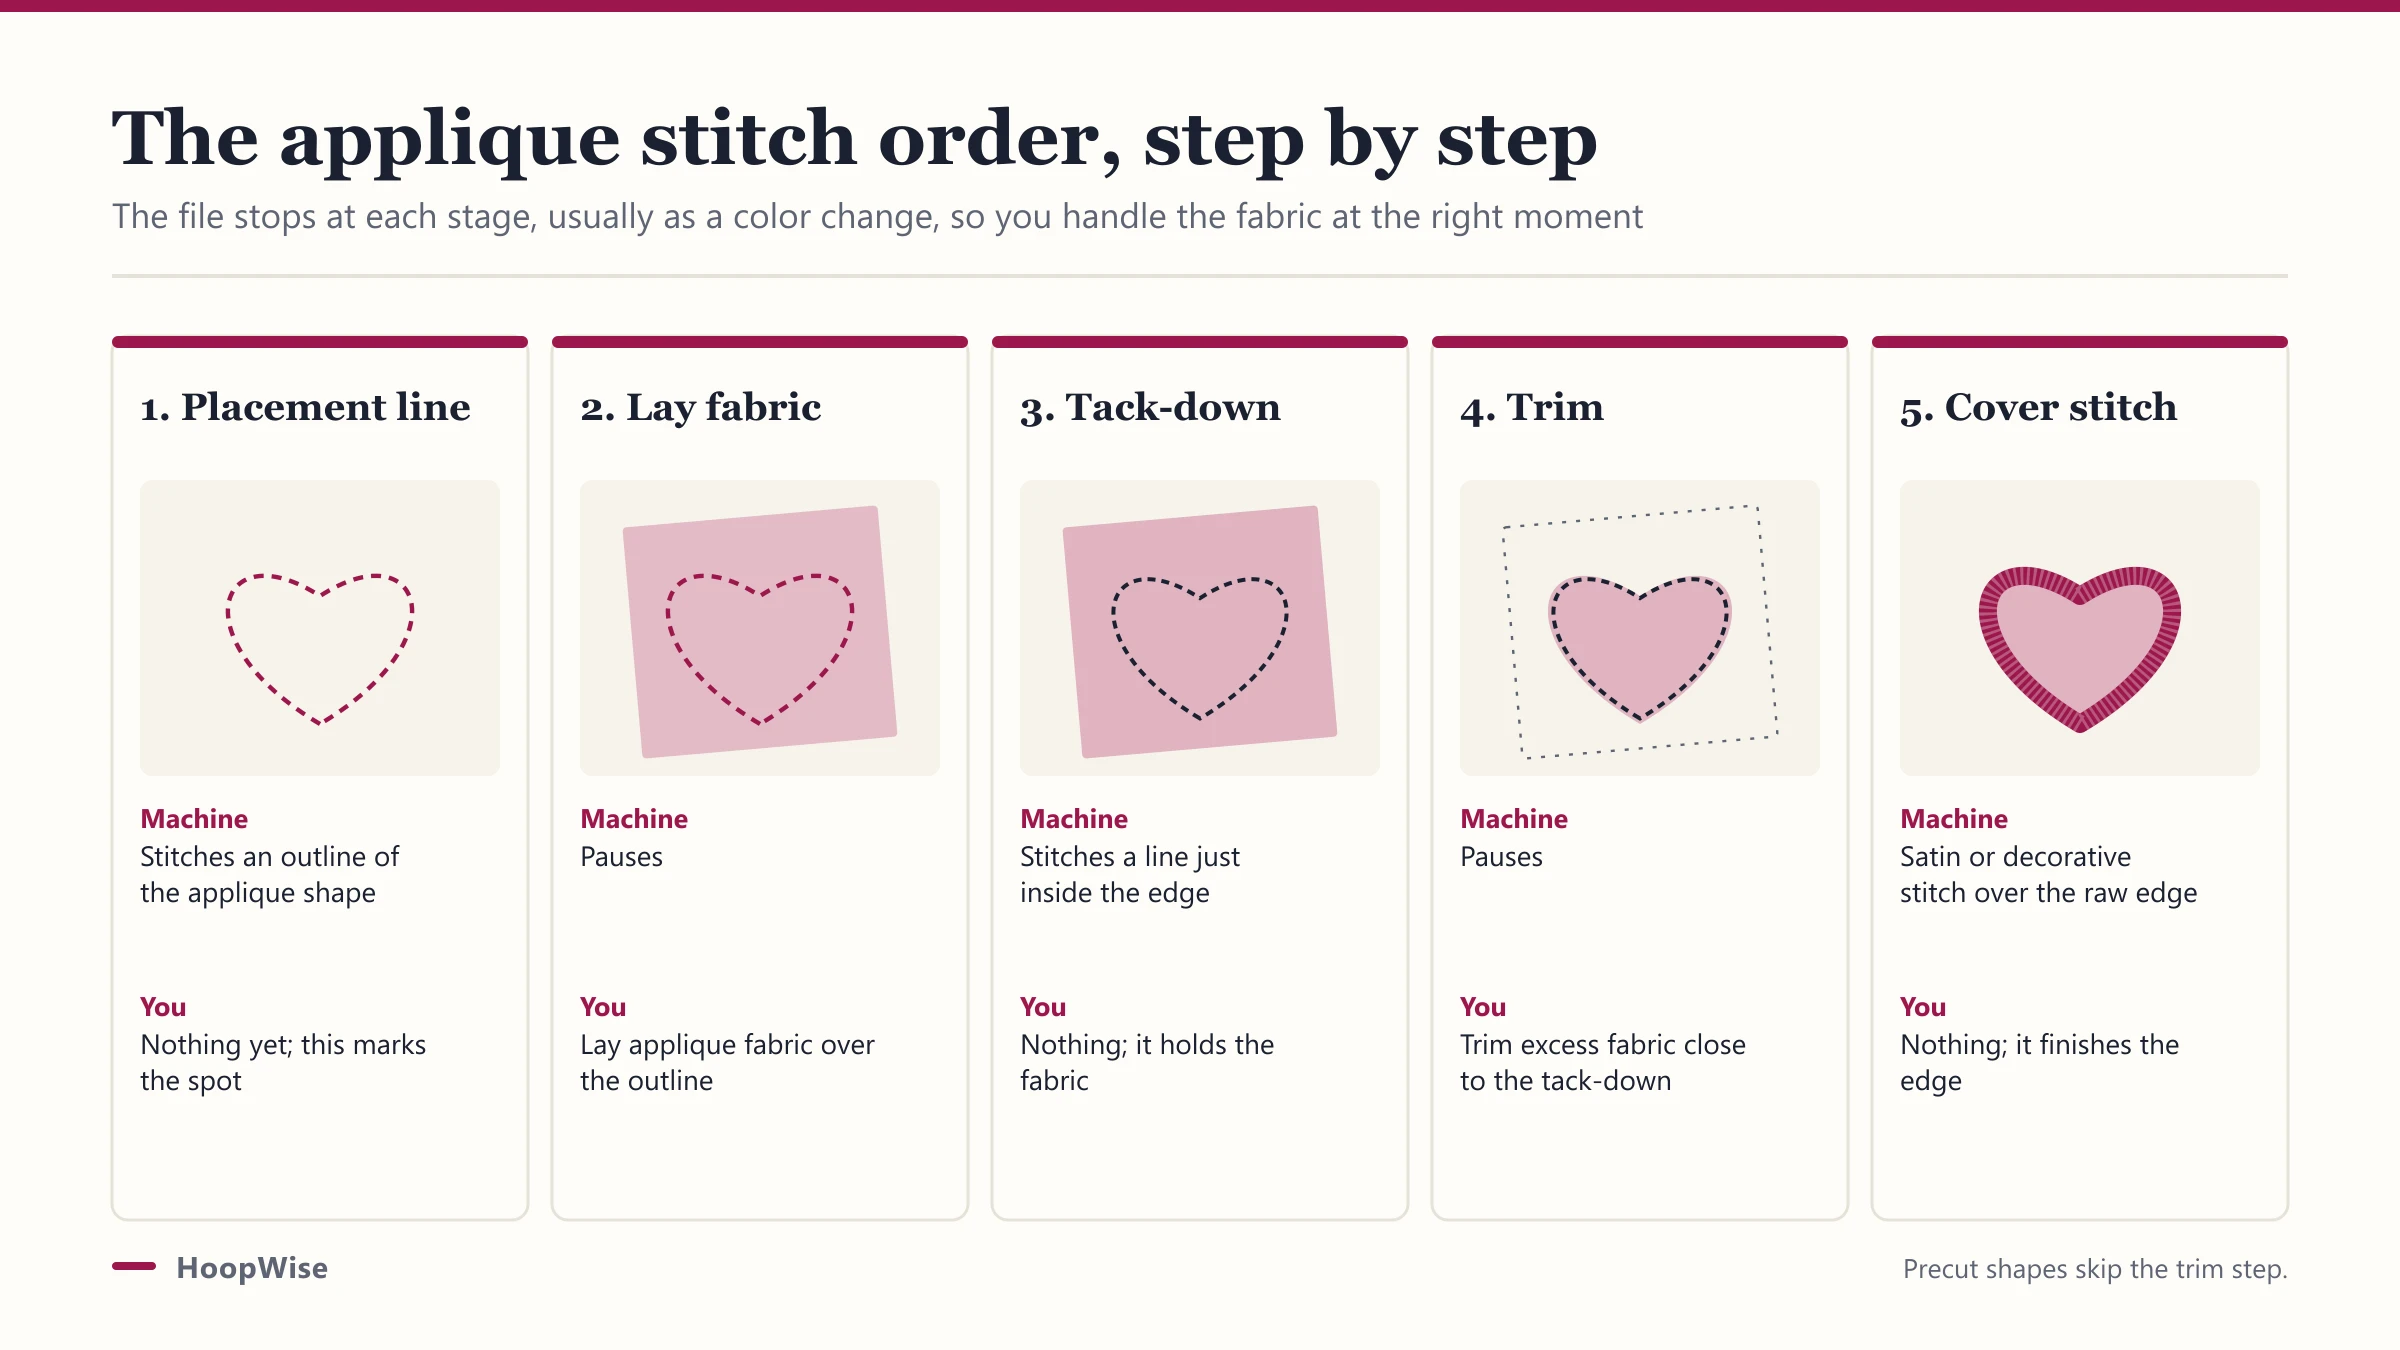
Applique is embroidery’s shortcut: instead of filling a shape with thousands of stitches, you lay fabric in the shape and stitch only its edge. It uses less thread, stitches faster and adds texture. The whole technique is one fixed stitch order, and once you know what each step is for, any applique design makes sense.
How does machine embroidery applique work?
Applique works by stitching fabric onto fabric in four steps the design file controls: placement, tack-down, trim and cover. You do not improvise the order; the file stops at each stage and prompts you, usually as a color change, so you handle the fabric at the right moment.
The result is a shape made of fabric with a clean embroidered edge, rather than a shape made entirely of thread. This is why applique suits large areas: a 4 inch solid fill is heavy, slow and stiff, while a 4 inch applique is light, fast and soft. For small finished shapes you want to remove and attach elsewhere, see how to make embroidered patches, which uses a related but different sequence.
What is the applique stitch order?
The order is placement line, tack-down, trim, then cover stitch. Each is a separate step in the file, and the machine pauses between them.
| Step | What the machine does | What you do |
|---|---|---|
| 1. Placement line | Stitches an outline of the applique shape | Nothing yet; this marks the spot |
| 2. Lay fabric | Pauses | Lay applique fabric over the outline |
| 3. Tack-down | Stitches a line just inside the edge | Nothing; it holds the fabric |
| 4. Trim | Pauses | Trim excess fabric close to the tack-down |
| 5. Cover stitch | Satin or decorative stitch over the raw edge | Nothing; it finishes the edge |
Follow the color-stop prompts rather than the actual thread colors; many digitizers use a contrasting color for the placement line so you can see it, then the real color for the cover. Our beginner guide explains reading color stops.
Should you trim before or after stitching?
Most applique is trimmed in the hoop, after the tack-down and before the cover stitch, but precut applique trims first. The two methods trade handling effort for cutting tools.
- In-hoop trimming: stitch the tack-down, then trim the excess fabric close to the stitched line while it is still in the hoop. This is the standard method and needs only sharp scissors, ideally curved applique or duckbill scissors that protect the base fabric.
- Precut applique: cut the shape to size before you start, often with an electronic cutting machine reading the same shape, so you just place it on the placement line and skip in-hoop trimming. Faster at the machine, but it needs the cutter and precise alignment.
Trim as close to the tack-down as you safely can. Fabric left outside the tack-down pokes out past the cover stitch and looks ragged.
What fabric is best for applique?
Firm, tightly woven cotton is the easiest; felt is the most forgiving; knits need backing. The edge finish of the whole piece depends on how the applique fabric behaves when cut.
| Applique fabric | Fraying | Prep needed |
|---|---|---|
| Quilting cotton, firm woven | Low | None, or light starch for crispness |
| Felt (wool or acrylic) | None | None; will not fray |
| Knit, jersey | Curls and stretches | Fusible backing to stabilize |
| Flannel, loose woven | Moderate to high | Fusible backing, cut carefully |
| Twill, canvas | Low | None; takes dense cover stitch well |
Fraying fabrics can work if you back them with a fusible web first, which also helps them lie flat. For the full picture on base and applique fabrics, see best fabric for machine embroidery.
How do you keep applique edges clean?
A clean edge comes from close trimming, a cover stitch wide enough to hide the raw edge, and the right stabilizer. The satin cover stitch has to be wide enough to sit on both the applique and the base fabric; if it is too narrow, trimmed fabric or base shows through.
Stabilizer underneath keeps the whole area flat so the cover stitch wraps the edge evenly. Use cut-away behind knits and anything that will be washed often, tear-away behind stable wovens for decorative pieces. If the edge still shows frayed threads, you trimmed too far from the tack-down or the cover stitch is too narrow for the fabric. Our stabilizer guide matches backing to fabric.
Where do you find applique designs?
You need design files digitized specifically for applique, with the placement, tack-down and cover steps built in. A plain embroidery design will not have the applique stops, so you cannot applique from it without redigitizing.
Many design shops label applique designs clearly and often include the steps in the preview. Free sources exist too; see our free embroidery designs guide for where to look and how to check a file before stitching. If you digitize your own, the applique steps are standard objects in digitizing software, added in the same placement-tack-cover order.
What tools do you need for applique?
Applique needs little beyond ordinary embroidery supplies, plus one thing that matters: the right scissors. Sharp, curved applique scissors, sometimes called duckbill scissors, have an angled blade that lets you trim fabric close to the tack-down without nicking the base fabric underneath.
| Tool | Why it matters |
|---|---|
| Curved applique or duckbill scissors | Trim close in the hoop without cutting the base |
| Applique and base fabrics | The shape fabric and what it sits on |
| Stabilizer | Keeps the area flat for a clean cover stitch |
| Temporary spray adhesive or fusible web | Holds the applique fabric while it tacks down |
| Applique design files | Files with the placement, tack-down and cover steps |
A fusible web ironed to the back of the applique fabric both stops fraying and holds the piece during tack-down, which is worth the extra step on knits and loose weaves. Everything else you likely already have for ordinary embroidery.
What applique variations are worth knowing?
Beyond the basic single-layer applique, a few variations extend what you can do with the same stitch order. Each is a small change to how you handle the fabric, not a different machine skill.
- Reverse applique: the applique fabric goes under the base, and the base is cut away to reveal it, for a layered, recessed look.
- Multiple layers: several applique pieces stitched in sequence, each with its own placement, tack-down and cover, for designs with depth.
- Felt and precut shapes: using felt or a cutting machine’s precut pieces removes fraying and in-hoop trimming, which is the easiest route for beginners.
- Decorative cover stitches: a blanket or bean stitch instead of satin, for a softer, hand-stitched look on a quilt or home decor.
Start with a single felt shape and a satin cover, then try layers and decorative edges once the order is second nature. For fabric choices behind each variation, see best fabric for machine embroidery.
Who should skip applique?
- Anyone wanting fine detail. Applique suits bold, simple shapes; small or intricate shapes are better as a stitched fill.
- Embroiderers without sharp, suitable scissors. In-hoop trimming with the wrong scissors cuts the base fabric; get curved applique scissors first.
- Projects that must be very durable and smooth. A solid fill has no fabric edge to fray or lift, so for heavy-wear logos a fill can outlast applique.
Applique is one of the most useful techniques to learn early, because it is forgiving, fast and teaches fabric handling. Start with felt shapes on a stable cotton base.
Sources: Applique stitch-order practice from Brother and Janome applique design documentation; digitizing software applique object workflow (placement, tack-down, cover); common fabric and scissors guidance from machine embroidery education materials.
Frequently asked questions
Quick answers to what readers ask us most
What is applique in machine embroidery?
Applique is stitching a piece of fabric onto a base fabric and covering its edge with embroidery, instead of filling a shape entirely with thread. It adds color and texture, uses far less thread than a solid fill, and stitches faster, which is why large designs often use applique areas.
What is the order of applique stitching?
Placement line first, which marks where the applique fabric goes; then you lay the fabric and the machine stitches a tack-down to hold it; you trim the excess fabric close to the tack-down; then a satin or decorative stitch covers the raw edge. The design file prompts each step as a color stop.
Do you trim applique before or after stitching?
Either, depending on the design. In-hoop trimming means stitching the tack-down then trimming the excess fabric in place before the cover stitch, which is the most common method. Precut applique means cutting the shape to size first, often with a cutting machine, so no in-hoop trimming is needed.
What fabric is best for applique?
Firm, tightly woven cottons and quilting fabrics are easiest because they resist fraying and sit flat. Felt does not fray at all and is very forgiving. Knits need a fusible backing to stop them stretching and curling. Loose weaves and fraying fabrics are the hardest to use.
Can any embroidery machine do applique?
Yes. Applique is a sequence of ordinary embroidery stitches, so any embroidery machine that runs applique designs can do it. You just need applique design files, the base and applique fabrics, stabilizer and sharp scissors for trimming in the hoop.